Use low to medium heat, avoid metal utensils, and never overheat an empty pan. Hand-wash with mild soap, dry immediately, and store with a soft liner to prevent surface damage.
Many folks struggle with keeping their nonstick pans looking and working like new. It often seems like once that slick surface starts to scratch or stick, the pan is basically done for. This can be really frustrating, especially when you’ve invested in good quality cookware.
But don’t worry! We’re going to break down exactly what you need to do, step by step, to make your nonstick pans last much, much longer. You’ll be surprised at how simple it can be.
Key Takeaways
- Proper cleaning methods are essential for preserving the nonstick coating.
- Using the right cooking utensils prevents scratches and damage.
- Avoiding extreme temperature changes protects the pan’s integrity.
- Storing nonstick pans carefully avoids accidental damage.
- Knowing when to replace a worn-out nonstick pan is also important.
- Specific cooking techniques can reduce wear and tear.
Caring for Your Nonstick Cookware
The secret to a long-lasting nonstick pan lies in how you treat it from day one. It’s not just about cooking; it’s also about how you clean, store, and even preheat these surfaces. Many common mistakes happen because people don’t realize how delicate these coatings can be.
Think of it like taking care of a valuable tool. A little bit of attention and the right knowledge goes a long way in making your pans perform their best for years to come. We’ll explore the fundamental principles that apply to nearly all nonstick surfaces, whether they are Teflon, ceramic, or other advanced coatings.
Gentle Cleaning Techniques
Cleaning your nonstick pans correctly is perhaps the single most important factor in extending their lifespan. Harsh scrubbing, abrasive cleaners, and putting them in the dishwasher too often can quickly degrade the nonstick surface. The goal is to remove food residue without scratching or wearing away the coating.
This means opting for soft sponges or cloths and mild dish soap. Even for stubborn bits, a little soaking with warm water and a drop of soap is usually enough.
- Use only soft sponges or cloths for washing.
- Never use steel wool, scouring pads, or abrasive cleaners.
- Wash immediately after the pan has cooled down.
When you use a soft sponge, you are gently lifting away food particles. This is in contrast to scouring pads, which act like sandpaper, scraping off microscopic layers of the nonstick material with each use. Over time, this repeated scraping will cause the coating to become less effective and more prone to sticking.
For example, imagine trying to buff a car with sandpaper; it removes paint and leaves scratches. The same principle applies to nonstick coatings, albeit on a much smaller scale.
Washing the pan soon after it cools is also key. Hot pans can sometimes cause stuck-on food to harden even more, making it harder to remove. Letting it cool slightly, then washing, helps to loosen any residual food without requiring excessive force.
A good practice is to rinse the pan with warm water as soon as it’s safe to handle. If there are still bits of food, a bit of dish soap and a gentle wipe are usually sufficient. Avoid letting dirty pans sit for extended periods, as this can lead to baked-on residue that’s much harder to tackle.
Dishwasher Do’s and Don’ts
While many modern nonstick pans are labeled as “dishwasher safe,” it’s generally best to avoid the dishwasher if you want to maximize their life. The high heat, aggressive detergents, and the jostling of items in a dishwasher can all contribute to premature wear of the nonstick coating. Even if the manufacturer says it’s okay, handwashing is always the gentler option.
If you must use the dishwasher, place the nonstick pan on the top rack, away from sharp utensils, and use a mild detergent.
- Handwashing is always preferred for maximum lifespan.
- If using a dishwasher, place on the top rack.
- Use mild dish detergents and avoid high-heat cycles.
The detergents used in dishwashers are often much stronger than regular dish soap. They contain chemicals designed to break down grease and food particles effectively, but these can also break down the nonstick coating over time. Think of it as a continuous, low-level chemical attack on the surface.
Furthermore, the constant exposure to high temperatures in a dishwasher, especially in heated drying cycles, can also weaken the bond between the nonstick layer and the pan’s base. This can lead to flaking or peeling, even if you don’t see immediate signs of damage.
To illustrate, consider how certain sensitive fabrics might fade or degrade if constantly put through a harsh washing cycle. Nonstick coatings, while durable for cooking, are similarly sensitive to the extreme conditions of a dishwasher. A scenario where this becomes clear is when a pan that has been frequently run through the dishwasher starts to develop small hot spots or areas where food begins to stick, despite not showing obvious scratches.
This is a sign that the coating itself has been compromised by the aggressive cleaning environment.
Cooking Practices for Longevity
How you use your nonstick pans during cooking plays a huge role in how long they will last. Simple adjustments in your cooking habits can prevent damage that might not be immediately apparent but will shorten the pan’s usable life. The key is to be mindful of heat levels, the types of food you cook, and the utensils you use.
These practices are designed to keep the nonstick surface intact and functioning optimally, ensuring your meals continue to slide off with ease.
Appropriate Utensil Choices
This is a critical rule for nonstick pans: never use metal utensils. Metal utensils, even those with rounded edges, can scratch and gouge the nonstick coating. Over time, these small scratches accumulate, creating areas where food sticks and making the pan less effective.
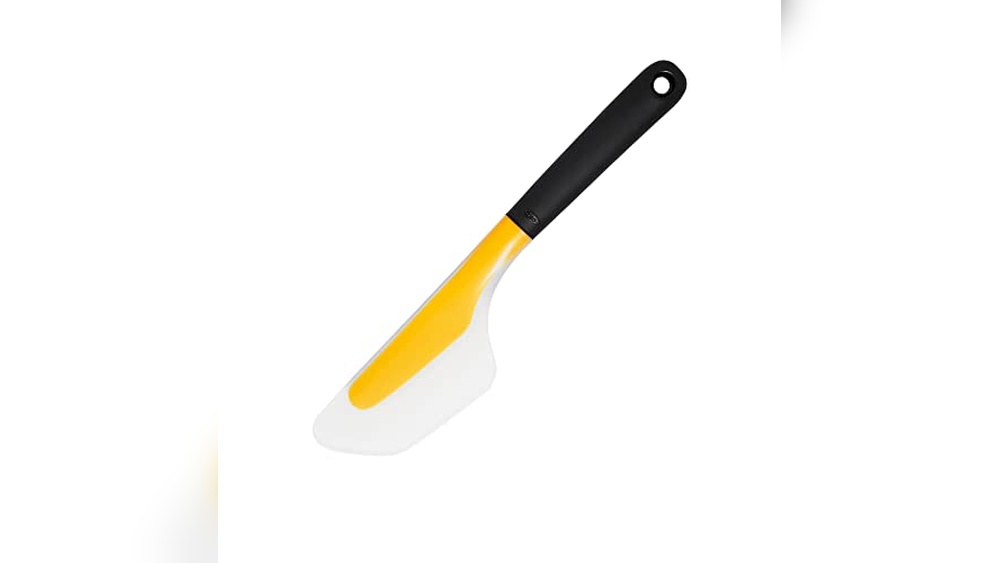
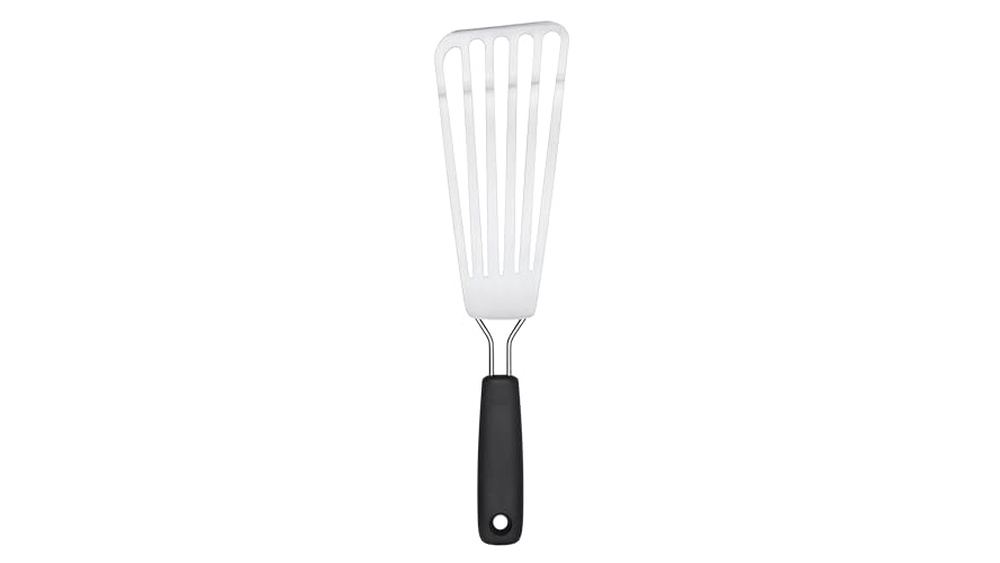
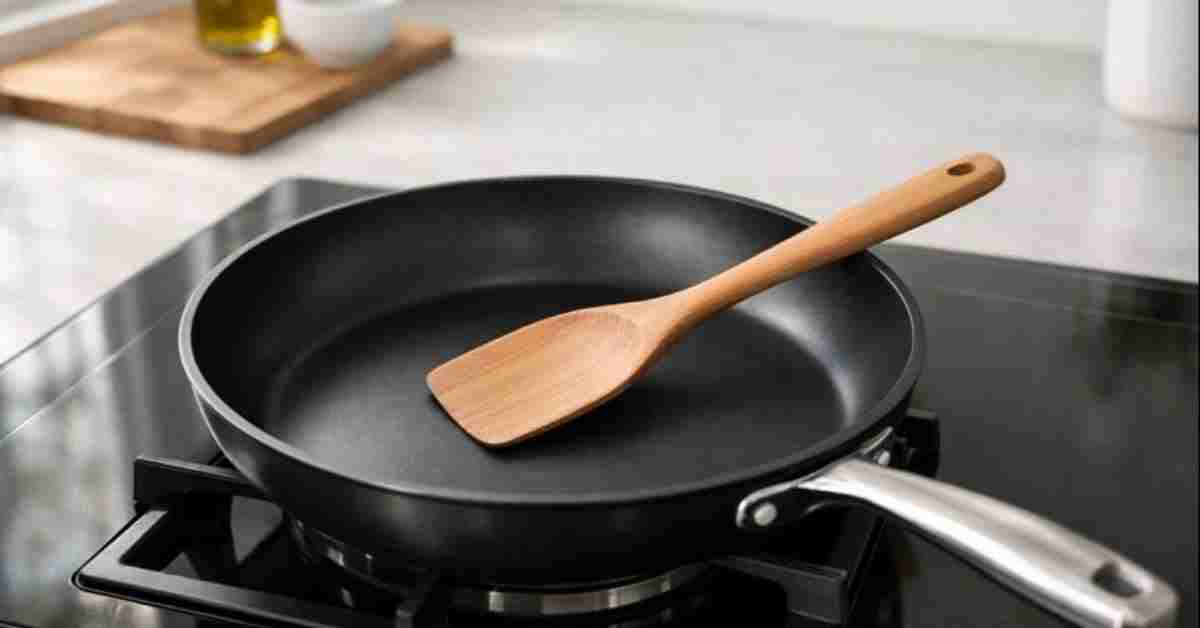
The best choices are silicone, wood, or plastic utensils that are specifically designed to be safe for nonstick surfaces. These materials are soft enough not to damage the coating.
- Always use silicone, wood, or plastic utensils.
- Avoid metal spatulas, forks, and knives.
- Rounded edges on plastic or silicone are even better.
Silicone and wood are preferred because they have a natural pliability and softness. Metal, on the other hand, is rigid and hard. When you use a metal spatula to flip pancakes or stir vegetables, you’re essentially using a tiny, hard object to scrape against the delicate nonstick surface.
Even if you are careful, accidental bumps or scrapes can occur, leading to micro-abrasions that compromise the coating. A study by the cookware industry found that using metal utensils on nonstick pans reduced their effective lifespan by up to 70%.
Think of it like drawing on paper. If you use a crayon, you leave color without damaging the paper. If you use a sharp pencil, you can leave marks that are hard to erase and can even tear the paper.
Your nonstick pan’s coating is like the paper, and your utensils are the drawing tools. To keep the surface smooth and intact, you need to use the “crayon” equivalent – soft, non-abrasive tools.
Managing Heat Effectively
Nonstick pans are not meant for extremely high heat. Most nonstick coatings are designed to perform optimally at medium heat. Overheating can cause the coating to break down, release fumes, and eventually become less effective.
This is especially true for older nonstick technologies. Always preheat your pan on medium heat for a minute or two before adding food. Avoid “seasoning” your nonstick pan with oil at very high temperatures, as this is a technique more suited for cast iron.
- Cook primarily on medium heat.
- Avoid preheating empty nonstick pans on high heat.
- Never use cooking spray, as it can build up residue.
When a nonstick pan is heated beyond its recommended temperature, the polymers that create the nonstick surface can begin to degrade. This process is irreversible. At very high temperatures, these polymers can break down, leading to a loss of nonstick properties.
For some older types of nonstick coatings, overheating could also release potentially harmful fumes. Modern coatings are generally safer, but performance degradation is still a significant concern. A temperature of around 450°F (230°C) is often cited as the maximum for most nonstick surfaces.
A common scenario involves someone trying to sear a steak or get a really crispy crust on something quickly by cranking up the heat on a nonstick pan. While this might work for stainless steel or cast iron, it’s a recipe for disaster for nonstick. The rapid, intense heat causes the coating to expand and contract violently, leading to micro-fractures and a permanent reduction in its slickness.
This is why recipes for nonstick pans often emphasize medium heat and patience, rather than brute force heat.
The Role of Cooking Oils and Sprays
When cooking with nonstick pans, you often need very little oil or butter, if any. However, if you do use oil, choose one with a high smoke point like canola, vegetable, or avocado oil. Avoid cooking sprays.
While they seem convenient, cooking sprays contain emulsifiers and propellants that can build up on the nonstick surface over time. This residue is difficult to remove completely and can create a sticky layer that defeats the purpose of the nonstick coating. If you have a buildup, you may need to use a specialized cleaner or consider it a sign the pan is nearing the end of its life.
- Use minimal amounts of high smoke point oils.
- Avoid all cooking sprays.
- Wipe away excess oil before cooking if not needed.
Cooking sprays are formulated to create a very fine mist that coats the cooking surface evenly. However, the ingredients in these sprays, such as lecithin or dimethyl silicone, don’t always vaporize completely. Instead, they can polymerize or bake onto the pan’s surface when heated repeatedly.
This creates a gummy, sticky film that is not only unsightly but also interferes with the natural nonstick properties of the pan. It’s like trying to cook on a surface that’s been lightly glued.
Imagine trying to clean a pan that has a thin, caramelized layer of cooking spray residue baked onto it. It doesn’t wipe off easily with a normal wash. You might need to use a bit more force or a special degreaser, which can, in turn, also affect the nonstick coating.
This is why many manufacturers and cooking experts strongly advise against their use on nonstick cookware. For example, a brand like Emeril Lagasse, known for his cookware lines, often stresses the importance of avoiding cooking sprays on their nonstick products to ensure their longevity.
Proper Storage and Maintenance
Even when not in use, your nonstick pans can suffer damage. Improper storage is a common culprit for scratches and dents that can ruin the cooking surface. Taking a few simple precautions when putting your pans away can make a big difference in preventing accidental damage and keeping them in great shape for longer.
These methods are straightforward and require minimal effort but yield significant results.
Protecting Surfaces During Storage
The simplest way to protect your nonstick pans during storage is to prevent them from touching each other directly. If you stack your pans, place a soft cloth, paper towel, or a pan protector between each one. This creates a buffer that absorbs any friction or impact.
If you have a pan rack, hang your pans so they don’t rub against each other. This prevents scratches and chips that can compromise the nonstick coating.
- Use pan protectors, cloth, or paper towels between stacked pans.
- Hang pans when possible to avoid stacking.
- Store lids separately or with a protective layer if stacked.
When pans are stacked without protection, the metal rims or bases of one pan can easily scrape against the nonstick surface of the pan below. Even if the damage isn’t immediately visible, these micro-scratches weaken the coating over time. A paper towel or a soft cloth acts as a sacrificial layer, absorbing any friction.
Over years of use, this simple act can prevent dozens of small scratches from accumulating, preserving the integrity of the nonstick surface.
Consider a scenario where someone has a set of nested nonstick pans. If they are simply pushed inside each other without any protective material, the edges of the outer pan will constantly rub against the inner surface of the pan it’s nested in. This is a recipe for damage.
By placing a silicone mat or even a folded tea towel between them, this abrasive contact is eliminated, and the nonstick surface remains pristine.
Occasional Deep Cleaning and Seasoning
While daily cleaning is essential, occasionally, a deeper clean or a light “seasoning” can help maintain the nonstick surface. For a deep clean, you can use a paste of baking soda and water and gently scrub the pan. For seasoning, after the pan is clean and dry, rub a very thin layer of cooking oil (like canola or vegetable oil) all over the interior surface with a paper towel.
Then, heat the pan on low heat for a few minutes until it just begins to smoke, then let it cool and wipe off any excess oil. This can help fill in tiny pores and reinforce the nonstick properties. However, do this sparingly, perhaps only once every few months.
- Use a baking soda and water paste for stubborn residue.
- Lightly oil and heat the pan on low for occasional reinforcement.
- Perform deep cleaning or seasoning infrequently.
Baking soda is a mild abrasive that can help lift away tough, baked-on food particles without being as harsh as commercial abrasive cleaners. Its alkaline nature also helps to cut through grease. When used with a soft sponge and gentle circular motions, it can restore a bit of the pan’s original finish.
The baking soda paste is essentially a gentle exfoliant for your nonstick pan.
The occasional light seasoning process is inspired by cast iron seasoning but is much simpler and less intense for nonstick. The idea is to create a very thin, polymerized layer of oil on the surface. This layer can fill microscopic imperfections in the nonstick coating and provide a smoother surface for food to glide on.
It’s important to use very little oil and low heat, as too much oil or high heat can create a sticky, gummy residue, which is the opposite of what you want. This technique is best for pans that are still in good condition but showing slight signs of wear.
Knowing When It’s Time to Replace
Despite your best efforts, all nonstick pans will eventually wear out. It’s important to recognize the signs that your nonstick pan is no longer safe or effective to use. Continuing to use a damaged nonstick pan can lead to food sticking, uneven cooking, and potential health concerns if the coating is severely degraded.
Knowing when to let go is part of responsible cookware ownership.
Signs of a Worn-Out Nonstick Pan
The most obvious sign is when food starts to stick to the pan, even with oil or butter. If you see scratches, chips, or peeling in the nonstick coating, it’s also a clear indication that the pan should be retired. Another sign is if the pan warps or develops hot spots where food cooks unevenly.
If the surface looks dull, uneven, or has a permanent discoloration that you can’t clean off, it’s probably time for a replacement.
- Food consistently sticking to the surface.
- Visible scratches, chips, or peeling of the coating.
- Warping of the pan or development of hot spots.
- Surface discoloration or dullness that won’t come clean.
When food begins to stick, it means the integrity of the nonstick layer has been compromised. The polymers that provide the smooth, slippery surface are either worn away or damaged. This allows food molecules to directly interact with the base metal or the underlying layer, causing them to adhere.
It’s a feedback loop; the more you try to force food off a sticking surface, the more damage you inflict, making it worse.
Statistics show that the average lifespan of a nonstick pan, with good care, is about 3 to 5 years. However, with poor care, this can be reduced to as little as 1 to 2 years. If you notice any of the signs mentioned above before this timeframe, it’s a strong indicator that your usage or cleaning habits need adjustment for future pans.
For instance, a pan that’s only a year old but already shows significant sticking issues might be the result of frequent use of metal utensils or overheating.
The Health and Safety Aspect
Using a nonstick pan with a degraded coating can be a health concern. Older nonstick coatings, particularly those containing PFOA (perfluorooctanoic acid), could release harmful chemicals when overheated or scratched. While most modern nonstick pans are PFOA-free, severely damaged coatings can still break down into particles that may be ingested.
It’s always best to err on the side of caution and replace any nonstick pan that shows signs of significant wear or damage. A shiny, smooth, and intact surface is the safest and most effective for cooking.
- Avoid using pans with severely scratched or peeling coatings.
- Modern nonstick pans are generally PFOA-free, but damage still poses risks.
- Replace pans showing significant degradation for health and performance.
Even without PFOA, other nonstick materials can degrade into fine particles when the coating is compromised. While the long-term health effects of ingesting small amounts of these particles are still being researched, it’s generally understood that we should avoid them. The nonstick coating is designed to stay bonded to the pan, not to be consumed.
When it flakes off or becomes severely abraded, it enters the food and subsequently our digestive system.
Consider the scenario of making scrambled eggs in a scratched nonstick pan. You might notice tiny black specks in your eggs, which are fragments of the coating. While a single instance is unlikely to cause harm, repeated exposure from a heavily damaged pan is not recommended.
This is why manufacturers often suggest replacing nonstick cookware every few years, even with good care, as the materials naturally degrade over time and with repeated use.
How To Extend Nonstick Lifespan With Smart Cooking
Beyond the basic cleaning and utensil rules, there are more advanced cooking techniques that can further prolong the life of your nonstick pans. These are subtle adjustments that, when combined with other good practices, create a synergistic effect, making your cookware last significantly longer. Think of it as a holistic approach to nonstick care.
Preheating Smartly
Proper preheating is crucial for achieving good cooking results and protecting your nonstick surface. Always preheat your pan on medium or medium-low heat for 1-2 minutes before adding any oil or food. This gentle warming allows the metal to expand slightly and become receptive to the oil, creating a more even, non-stick surface without stressing the coating.
Avoid the temptation to blast the heat to speed things up. A slightly longer preheat on moderate heat is far better for the pan’s longevity.
- Preheat on medium-low for 1-2 minutes before adding oil.
- Ensure the pan is evenly warmed before adding ingredients.
- Avoid excessively high preheating temperatures.
When a pan is heated too quickly or too intensely, the metal can expand unevenly. This can create internal stresses within the pan’s structure and, more importantly, within the nonstick coating itself. Over time, this can lead to micro-fractures that weaken the coating and reduce its effectiveness.
A gradual increase in temperature allows the pan and its coating to expand in a more controlled and uniform manner, minimizing stress and preserving the integrity of the nonstick surface.
A real-life example is the difference between taking a cold car engine and immediately flooring the accelerator versus letting it warm up for a minute or two. The latter approach reduces wear and tear. Similarly, warming your nonstick pan gently prepares it for cooking, reducing stress on its delicate surface.
This principle of gradual heating is essential for materials that are sensitive to thermal shock or rapid temperature changes.
Fat and Oil Management
As mentioned earlier, avoid cooking sprays. If you choose to use oil, use it sparingly. For most everyday cooking on a nonstick pan, a teaspoon or two of oil is sufficient.
Wipe excess oil with a paper towel before adding food, especially if you are not looking for a significant amount of browning. This prevents the oil from pooling and potentially burning, which can contribute to residue buildup. If you are cooking very lean items that could potentially stick, a small amount of butter or oil is best.
- Use minimal amounts of high-smoke-point oils.
- Wipe away excess oil before adding food.
- Consider butter or specific cooking oils for certain dishes.
When oil pools in the pan, it can create uneven heating and become a breeding ground for burnt-on residue. A thin, even layer of oil is what helps create that initial barrier for extra nonstick protection. Excess oil, however, does not increase the nonstick capability; it only increases the risk of burning and residue.
This is why wiping the pan with a paper towel after adding oil is a recommended step for many cooking applications.
Imagine trying to paint a wall with a bucket of paint and a huge brush versus using a roller with a thin, even coat. The roller provides better coverage and a smoother finish. Similarly, a thin layer of oil on a nonstick pan provides an even barrier.
Too much oil is like flooding the surface, leading to problems. This is why professional chefs often advocate for very light oil applications when using nonstick cookware.
Cooking Low-Acid Foods
While nonstick pans are versatile, they perform best with foods that don’t have high acidity. Highly acidic foods like tomatoes, citrus juices, or vinegars can, over time, slightly etch or react with some nonstick coatings. This is more of a concern with older or lower-quality coatings, but it’s still a good practice to be mindful of.
For dishes heavily featuring acidic ingredients, consider using stainless steel or cast iron pans where appropriate. This doesn’t mean you can never cook acidic foods in nonstick, but it’s about minimizing prolonged exposure at high heat.
- Be cautious with long cooking times of highly acidic foods.
- Consider stainless steel or cast iron for very acidic dishes.
- Enjoy nonstick pans for everyday cooking of most foods.
Acids can chemically react with certain materials, causing them to degrade. While modern nonstick coatings are designed to be quite resistant, prolonged exposure to strong acids, especially when combined with heat, can lead to a breakdown of the surface. This is similar to how lemon juice can brighten tarnished metal; it’s a chemical reaction.
The nonstick coating is a polymer layer, and like many polymers, it can be susceptible to chemical attack from strong acids over time.
A scenario where this might be relevant is making a long-simmered tomato sauce. While you can certainly start the sauce in a nonstick pan, transferring it to a stainless steel pot for the bulk of the simmering time might be beneficial for preserving the nonstick pan’s coating. This ensures that the acidic tomatoes aren’t sitting in the nonstick pan at high temperatures for hours on end, reducing potential long-term impact.
When to Replace Your Nonstick Pan
Sometimes, the best way to extend the lifespan of your nonstick pans is to know when they’ve reached the end of their useful life. Continuing to use a damaged nonstick pan can lead to food sticking, uneven cooking, and potentially even health concerns if the coating is severely degraded. Recognizing these signs is as important as knowing how to care for them.
Visible Damage and Performance Issues
The most obvious indicators are physical damage. If you see deep scratches, chips, or any peeling of the nonstick coating, it’s time to say goodbye. These imperfections not only ruin the nonstick surface but can also lead to food getting trapped in the damaged areas.
Furthermore, if food consistently sticks to the pan, no matter how much oil you use or how well you clean it, the nonstick coating has likely failed. This means the pan is no longer performing its primary function effectively.
- Deep scratches, chips, or peeling mean immediate replacement.
- Persistent sticking is a definitive sign of coating failure.
- Warped pans or uneven heating also indicate it’s time to replace.
When the nonstick coating begins to fail, it’s because the chemical bonds that create the slippery surface have broken down. This can happen due to wear and tear, thermal shock, or exposure to harsh cleaning agents. Once these bonds are broken, the coating loses its ability to repel food, and you’ll start to notice that food adheres to the surface.
This is not a cosmetic issue; it’s a functional failure of the pan’s primary purpose.
Consider a pan that’s only a couple of years old, but you find yourself needing to scrape food off after every meal, even when using oil. This is a classic sign that the nonstick coating is gone. You might have tried all the cleaning methods, but the damage is done at a microscopic level.
It’s like trying to inflate a punctured tire; no amount of patching will restore its original function permanently.
Health and Material Degradation
While most modern nonstick pans are PFOA-free, severely degraded coatings can still break down into particles that are best avoided. The concern is that if the coating is flaking off, you might be ingesting small pieces of the material. Even if the materials themselves are deemed safe in their intact form, consuming them in fragments is not ideal.
It’s always better to
- Prioritize health by replacing damaged pans.
- Avoid ingesting any flaking or peeling material from the coating.
- Look for signs of material degradation beyond just scratches.
The integrity of the nonstick coating is paramount for both performance and safety. When the coating degrades, it might release microscopic particles. While the exact health impacts of ingesting these particles from modern, PFOA-free coatings are not fully understood, the general consensus in food safety is to avoid consuming non-food materials.
Therefore, if your pan is shedding its coating, it’s a clear signal to replace it.
A helpful analogy is with plastics; while certain plastics are food-safe, scratched or degraded plastic containers are often advised against for food storage because the material can break down and leach into food. Nonstick coatings, though different, share a similar principle of maintaining surface integrity for safe use. A nonstick pan that’s visibly damaged is akin to a cracked plastic container – best retired.
Frequently Asked Questions of How To Extend Nonstick Pan Lifespan
How often should I clean my nonstick pans?
It’s best to clean your nonstick pans after every use, once they have cooled down enough to handle. This prevents food from hardening and becoming more difficult to remove.
Can I use cooking spray on my nonstick pans?
No, it’s generally recommended to avoid cooking sprays. They can build up a sticky residue that is difficult to remove and harms the nonstick surface over time.
How do I store nonstick pans to prevent scratches?
Place a soft cloth, paper towel, or pan protector between each pan when stacking them to prevent scratching.
What temperature is too high for nonstick pans?
Most nonstick pans perform best at medium heat. Overheating above 450°F (230°C) can degrade the nonstick coating and reduce its lifespan.
How long does a nonstick pan typically last?
With proper care, a nonstick pan can last 3 to 5 years. However, heavy use or improper care can shorten its lifespan significantly.
Final Thoughts
Keeping your nonstick pans in top shape is really about consistent, gentle care. It’s not about extreme measures, but rather small, everyday habits that make a big difference over time.
By using the right utensils, controlling your heat, and cleaning your pans gently, you’re setting them up for a much longer and more effective life in your kitchen.
Remember that even the best nonstick surfaces will eventually wear down, so learning to recognize when it’s time for a replacement is also a key part of being a smart cook. Enjoy many more meals that slide effortlessly from your well-cared-for pans, and don’t be afraid to apply these simple, effective tips to your cooking routine.
Experiment with these methods and see how your favorite nonstick cookware responds with renewed performance and durability for years to come.