Common nonstick cooking mistakes include using metal utensils, overheating empty pans, and cleaning with abrasive sponges, all of which damage the coating. Cooking on high heat too often and stacking pans without protection also shortens the lifespan of nonstick cookware.
Cooking with nonstick pans can be a dream, but it’s easy to make a few mistakes that ruin your food and damage your pans. For beginners, especially, these little slip-ups can be frustrating. You might find your eggs sticking or your delicate fish flaking apart, making you wonder if your nonstick pan is actually working.
But don’t worry, getting it right is simpler than you think. We’ll walk through the most common nonstick cooking mistakes and show you exactly how to fix them, making your kitchen adventures smoother and your meals tastier.
Key Takeaways
- Preheating nonstick pans too high can damage the coating.
- Using metal utensils will scratch and ruin nonstick surfaces.
- Overcrowding the pan leads to steaming instead of searing.
- Cleaning nonstick pans with abrasive materials will shorten their lifespan.
- Storing nonstick pans improperly can cause damage.
- Using too much oil is unnecessary and can lead to buildup.
Why Nonstick Pans Stick Sometimes
Many people believe nonstick pans are foolproof, but that’s not always the case. The special coating, usually made of polytetrafluoroethylene (PTFE) or ceramic, is designed to prevent food from adhering. However, this delicate surface can be easily compromised.
When beginners use too much heat, they can break down the coating, causing food to stick just like in a regular pan. Also, many think they need to use lots of oil to ensure food doesn’t stick, but nonstick pans require very little, making too much oil another reason for food to get stuck or for the pan to develop a sticky residue.
The Heat Is On Too High
One of the most frequent errors is cranking the heat up too high when cooking with nonstick cookware. Nonstick surfaces, particularly those with PTFE coatings, are sensitive to extreme temperatures. When heated beyond their recommended limits, the coating can degrade, leading to a loss of its nonstick properties and potentially releasing fumes.
This degradation is not just about making your food stick; it’s about damaging the pan’s integrity. For instance, a beautiful sear on a piece of chicken can quickly turn into a burnt mess stuck to the bottom if the heat is too intense.
- Medium heat is usually sufficient for most nonstick cooking tasks.
- High heat can permanently damage the nonstick coating.
- Look for visual cues like shimmering oil to indicate proper preheating temperature.
Most nonstick pans perform best when heated gradually over medium heat. This allows the pan to reach an even, optimal cooking temperature without stressing the coating. Imagine trying to gently warm a delicate fabric versus exposing it to a blast of hot air; the latter would cause damage.
Similarly, nonstick coatings benefit from gentle, consistent heat. If you’re trying to achieve a crispy exterior on something like pan-fried potatoes, it’s better to use medium heat for a bit longer than to blast it with high heat, which could burn the outside while leaving the inside uncooked and the pan’s surface compromised.
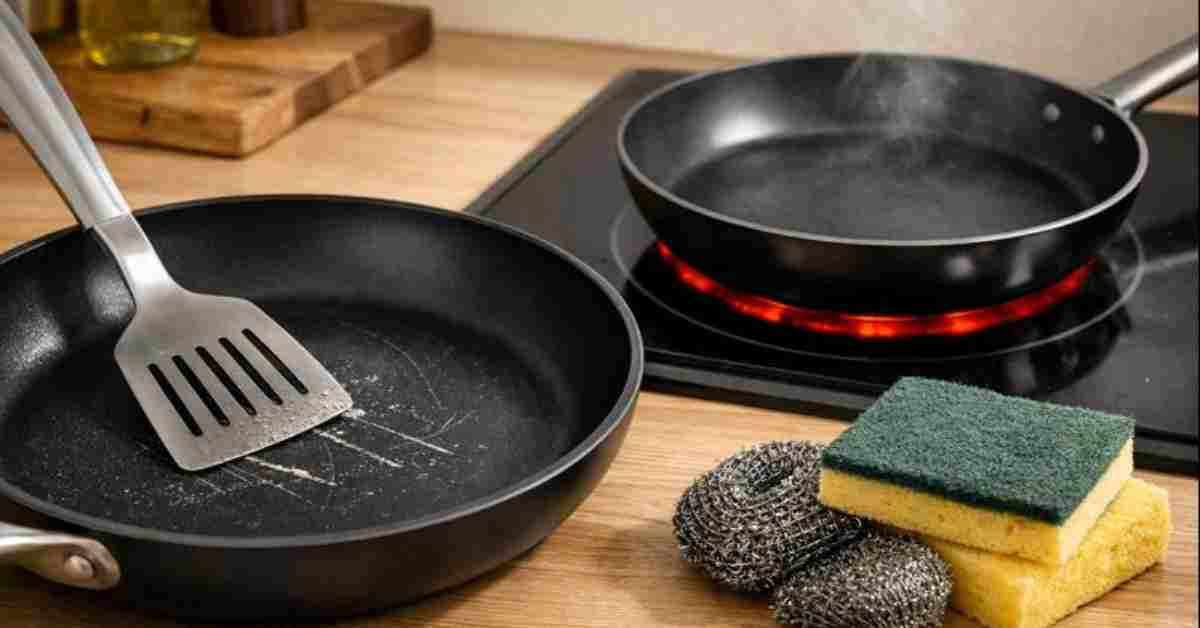
Scraping With Metal Utensils
Another major culprit behind sticky situations is the use of metal utensils. These can easily scratch and chip away at the nonstick coating, creating rough spots where food will invariably cling. Even seemingly minor scratches can compromise the pan’s effectiveness over time.
Think of the nonstick surface like a smooth, protective shield. When this shield is scratched or gouged, it loses its ability to repel food, and the damage is often irreversible. Using a metal spatula on a nonstick pan is akin to using sandpaper on a delicate surface; it will inevitably wear it down.
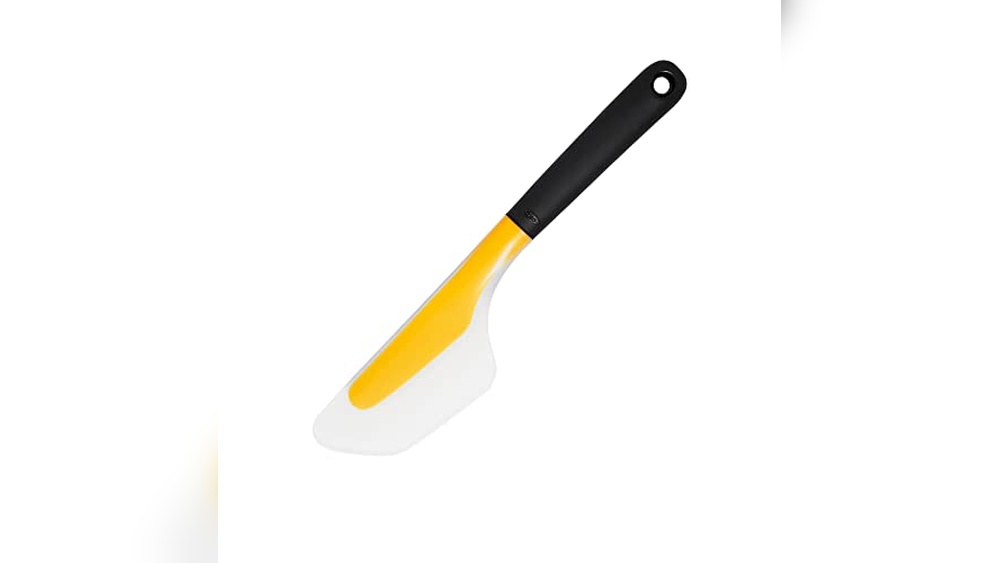
- Always opt for silicone, wood, or nylon cooking tools.
- These materials are gentle and won’t harm the nonstick coating.
- Even dishwasher detergent can be abrasive over time.
Silicone and wooden utensils are excellent alternatives. They are heat-resistant, durable, and most importantly, won’t scratch the nonstick surface. When you’re sautéing vegetables or flipping pancakes, a silicone spatula glides smoothly, ensuring your food releases effortlessly without damaging the pan.
This simple switch makes a significant difference in preserving your nonstick cookware and ensuring consistent cooking results. It’s a small habit change that pays off greatly in the longevity of your pans and the quality of your meals.
Overcrowding The Pan
Many home cooks mistakenly believe that filling the nonstick pan to the brim is an efficient way to cook more food at once. However, this often leads to steaming rather than searing or frying. When a pan is overcrowded, the food items release moisture, and instead of evaporating quickly due to good air circulation, the steam gets trapped.
This trapped steam prevents the food from developing a desirable crispy crust and can make it soggy. Furthermore, the reduced surface area for each piece of food to make direct contact with the hot pan means less efficient cooking and potential sticking as the food sits in its own moisture.
- Cook food in batches to allow adequate space for even cooking.
- This ensures proper browning and prevents steaming.
- A hot pan with room for food is key for nonstick success.
Proper spacing is crucial for achieving that perfect golden-brown exterior on everything from chicken cutlets to vegetables. When you give each piece of food its own space, the hot air circulates freely around it, allowing moisture to escape and the Maillard reaction—the browning process that creates flavor—to occur effectively. For instance, if you’re frying shrimp, overcrowding the pan will result in rubbery, steamed shrimp instead of beautifully crisp ones.
Cooking in smaller batches ensures each shrimp gets direct contact with the hot pan surface, promoting even cooking and preventing sticking.
Aggressive Cleaning Methods
The way you clean your nonstick pans can significantly impact their lifespan. Many people reach for abrasive scrubbers or harsh detergents, thinking they need to get every bit of residue off. However, these cleaning methods are detrimental to the delicate nonstick surface.
Steel wool, scouring pads, and even some dishwasher detergents can wear away the coating over time, creating microscopic tears that trap food and reduce the pan’s effectiveness. Even if a pan looks clean after an aggressive scrub, the coating has likely been compromised, setting you up for future sticking issues.
- Use a soft sponge or cloth for cleaning.
- Mild dish soap and warm water are usually sufficient.
- Allow the pan to cool before washing.
A gentle approach to cleaning is key to maintaining the integrity of your nonstick cookware. After the pan has cooled down slightly, use a soft sponge or cloth with a bit of mild dish soap and warm water. For more stubborn food bits, soaking the pan for a short period often does the trick without the need for harsh scrubbing.
This simple cleaning routine helps preserve the nonstick coating, ensuring your pans continue to release food easily for years to come. Think of it as pampering your pans to keep them in prime condition for all your cooking endeavors.
Improper Storage
How you store your nonstick pans can also lead to damage and reduced performance. Piling other pots and pans directly on top of a nonstick surface can cause scratches and dents, even if you’re not actively cooking with them. These abrasions can compromise the coating, leading to sticking and a shorter lifespan for your cookware.
Storing them loosely stacked, with protectors between them, is a much better approach. A simple cloth, paper towel, or a dedicated pan protector can prevent the metal edges of other cookware from scraping against the nonstick surface.
- Use pan protectors or cloths between stacked pans.
- Avoid nesting pans too tightly if they have different sized rims.
- Hanging pans can also be a good storage solution.
Consider using felt pan protectors or even simple kitchen towels placed between each nonstick pan when stacking them in a cabinet. This creates a buffer zone, preventing metal-on-nonstick contact. Another effective storage method is hanging your pans on a pot rack.
This not only keeps them organized but also ensures they aren’t subjected to the weight of other cookware, thus preserving their delicate surfaces. Proper storage is a proactive step in maintaining your nonstick pans and ensuring they perform optimally for every meal.
Excessive Oil or Butter
While nonstick pans are designed to reduce the need for oil and butter, many home cooks still default to using generous amounts. This excess fat doesn’t just add unnecessary calories; it can also contribute to a sticky residue building up on the pan’s surface over time. This buildup can actually impair the nonstick properties.
If the oil or butter isn’t heated to the right temperature, or if it’s left to sit in the pan, it can polymerize and become difficult to remove, effectively creating a new sticking surface. A tiny amount is often all that’s needed, or sometimes nothing at all.
- Use only a small amount of oil or cooking spray if needed.
- Many foods release their own fats, making added oil unnecessary.
- Wipe out excess oil before adding food to the pan.
The beauty of a good nonstick pan is its ability to cook food with minimal or even zero added fat. A light mist of cooking spray or a teaspoon of oil is usually sufficient for most applications, especially when cooking items that are already somewhat fatty, like bacon or sausage. For leaner items like eggs or fish, the nonstick surface itself should be enough.
If you do use oil, ensure it’s heated properly; too low and it won’t prevent sticking, too high and it can burn and create that difficult-to-clean residue. Wiping out any excess oil with a paper towel before adding your food can also help maintain a clean, effective nonstick surface.
Common Nonstick Cooking Mistakes Explained
Many people struggle with their nonstick pans because they aren’t aware of the specific care these surfaces require. Unlike cast iron or stainless steel, nonstick coatings are quite sensitive. This section will explore the most frequent blunders people make, from how they heat the pan to how they wash it, and provide clear solutions for each.
These are the small details that make a big difference in keeping your nonstick cookware performing at its best.
The Preheating Problem
Preheating is essential for good cooking, but with nonstick pans, it’s a delicate balance. The common mistake is preheating the pan for too long or at too high a temperature. This can cause the nonstick coating to break down, leading to a loss of its nonstick capabilities.
The desired effect of preheating is to ensure the pan is evenly hot, allowing food to cook uniformly and release easily. However, if the pan gets too hot, the delicate polymers in the nonstick surface can degrade. This is particularly true for PTFE-based coatings, which have specific temperature limits.
Exceeding these can cause irreversible damage.
- Always preheat nonstick pans on medium heat.
- Never leave a preheating nonstick pan unattended.
- Test the heat by flicking a few drops of water; they should sizzle and evaporate quickly, not instantly disappear or burn.
A good rule of thumb for most nonstick pans is to preheat them over medium heat for about one to two minutes. This is usually enough time for the pan to reach an optimal cooking temperature without overheating the surface. If you’re unsure, a simple water test can be helpful.
Flick a few drops of water onto the pan; if they dance and sizzle before evaporating, the pan is ready. If they disappear instantly or cause a puff of smoke, it’s too hot. This gentle preheating ensures your food will cook evenly and release beautifully, without compromising the pan’s coating.
The Utensil Dilemma
The choice of utensils is a critical factor in maintaining nonstick cookware. Using metal spatulas, whisks, or knives directly on a nonstick surface is a recipe for disaster. These hard materials will scratch and chip away at the coating, creating divots and rough patches where food can cling.
Over time, these scratches accumulate, rendering the pan less effective and eventually useless. The smooth, slick surface of nonstick cookware is its primary advantage, and metal utensils directly undermine this feature. Even if the scratches seem small at first, they are the beginning of the end for your pan’s nonstick performance.
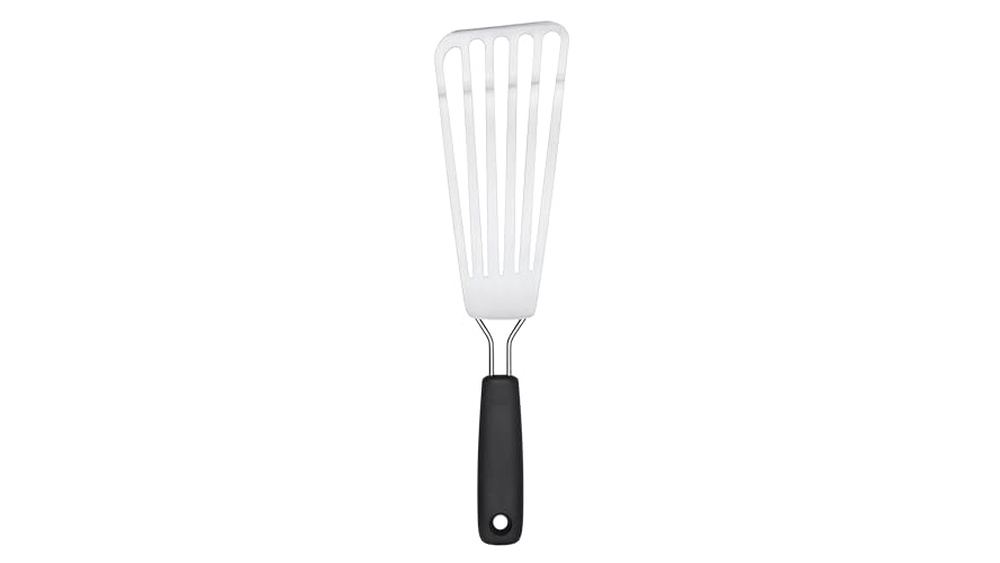
- Only use silicone, wood, or nylon utensils with nonstick pans.
- These materials are soft and won’t damage the delicate coating.
- Avoid utensils with sharp edges or metal components.
Investing in a set of silicone or wooden utensils is one of the smartest moves a cook can make for their nonstick cookware. These tools are designed to be gentle on surfaces while still being effective for cooking. Silicone spatulas, for example, are heat-resistant and flexible, making them perfect for scraping down bowls and flipping delicate items like eggs and crepes.
Wooden spoons and spatulas offer a natural, durable option that won’t scratch. By making this simple switch, you protect your investment and ensure your nonstick pans continue to serve you well for a long time, preventing the frustration of food sticking to damaged surfaces.
The Overcrowding Calamity
When cooking, especially with nonstick pans, it’s tempting to cook everything at once to save time. However, overcrowding the pan is a common mistake that leads to poor results. Instead of browning, the food steams.
This happens because when too much food is packed into the pan, it releases moisture, and this moisture has nowhere to go but to create steam. This steam prevents the food from getting the direct heat contact it needs to achieve a crispy, browned exterior. Instead, you end up with soggy, unappealing food that might also start to stick as it sits in its own moisture.
- Cook food in batches, ensuring there’s space between each piece.
- This allows heat to circulate and moisture to evaporate.
- Proper spacing leads to better browning and texture.
To achieve that desired sear or crispiness, each piece of food needs adequate space. When cooking chicken breasts, for instance, overcrowding the pan will cause them to steam, resulting in a pale, rubbery texture. By cooking them in batches, you allow each breast to make direct contact with the hot pan surface, promoting even browning and a delicious crust.
This also ensures that the natural juices released during cooking can evaporate efficiently, rather than pooling around the food and hindering the cooking process. The patience of cooking in smaller batches is rewarded with superior taste and texture.
The Cleaning Catastrophe
The way you clean your nonstick pans can make or break their longevity. Many people resort to harsh scrubbing pads, steel wool, or abrasive cleaners to remove stuck-on food. While these methods might seem effective in the short term, they wreak havoc on the nonstick coating.
The fine layer of protection gets worn away with each aggressive scrub, creating microscopic fissures that trap food particles. This leads to a cycle where food starts sticking more easily, prompting even more aggressive cleaning, further damaging the pan. The key is to be gentle and allow time for soaking if needed.
- Always use a soft sponge or cloth for cleaning.
- Mild dish soap and warm water are sufficient for most messes.
- Avoid placing hot pans directly into cold water, as this can cause thermal shock and damage.
A gentle cleaning routine preserves the nonstick surface. After cooking, let the pan cool down a bit. Then, use a soft sponge or microfiber cloth with a small amount of mild dish soap.
For tougher spots, a brief soak in warm, soapy water is often enough to loosen residue without damaging the coating. Avoid harsh chemicals or abrasive tools entirely. This careful approach ensures that your nonstick pans maintain their slick surface, making cooking easier and extending the life of your cookware.
It’s a small effort for a significant return in performance.
Storage Slip-ups
Proper storage is often overlooked but is crucial for keeping nonstick pans in good condition. When nonstick pans are stacked carelessly, the rims and surfaces of other cookware can scratch the delicate coating. This happens even when the pans aren’t being used.
The pressure of stacking, or slight shifts in the cabinet, can create fine scratches that compromise the nonstick properties. These seemingly minor abrasions are enough to cause food to stick later on, creating frustration and reducing the pan’s usefulness. It’s important to treat nonstick pans with a bit more care during storage.
- Use pan protectors, paper towels, or cloths between stacked pans.
- Avoid nesting pans too tightly.
- Consider hanging pans on a pot rack to prevent contact.
To prevent scratches, use a simple method like placing a soft cloth, paper towel, or a felt pan protector between each nonstick pan before stacking them. This creates a physical barrier, safeguarding the nonstick surface from abrasion. Another excellent option is to hang your nonstick pans on a wall-mounted pot rack.
This not only saves cabinet space but also ensures that the pans are not subjected to any pressure or contact with other cookware, thereby preserving their delicate surfaces and extending their functional life.
The Oil Overload
Nonstick pans are designed to minimize or even eliminate the need for cooking oil or butter. However, many people continue to use significant amounts, believing it enhances nonstick performance or prevents sticking. This is a common misconception.
Using too much oil or butter can actually lead to a sticky residue building up on the pan’s surface over time. This residue, often a result of polymerized fats that have been heated too many times, can impair the nonstick qualities of the pan. It creates a layer that food can adhere to, paradoxically making the pan less nonstick.
- Use a very small amount of oil or cooking spray, or none at all.
- Consider the natural fats released by the food you’re cooking.
- Wipe away any excess oil before adding food.
A light spray of cooking oil or a teaspoon of oil is usually more than enough for most nonstick cooking applications. For foods that naturally release fat, like certain meats, you might not need any added oil whatsoever. If you do choose to use oil, ensure it’s heated properly.
Cold oil won’t do much to prevent sticking, and oil heated too high can burn and create that problematic residue. Wiping the pan with a paper towel after adding a small amount of oil can help distribute it evenly and remove any excess, ensuring a clean surface for cooking.
Avoiding Common Nonstick Cooking Mistakes
Learning to cook with nonstick pans effectively involves understanding their unique needs. This part of our guide focuses on actionable steps and best practices that will help you avoid the pitfalls that lead to food sticking and premature wear. We’ll cover everything from the initial use of your pan to daily cooking and cleaning routines, ensuring you get the most out of your nonstick cookware.
The First Use Ritual
Before you even cook your first meal in a new nonstick pan, there’s a simple preparation step that can make a difference. Many manufacturers recommend seasoning the pan. This usually involves washing it with warm, soapy water, drying it thoroughly, and then applying a thin layer of cooking oil to the surface with a paper towel.
Heat the pan over low to medium heat for a few minutes, then let it cool and wipe out any excess oil. This process helps to seal the pores of the nonstick coating and establish a good initial nonstick barrier. It’s a small step that contributes to better performance from the start.
- Wash new pans with warm, soapy water before first use.
- Seasoning involves heating a thin layer of oil on the surface.
- This initial preparation enhances the pan’s nonstick properties.
Think of this initial seasoning as giving your nonstick pan a protective base layer. It fills in any microscopic imperfections in the coating, making it more resilient and less likely to allow food to stick. When you follow this simple ritual before your first use, you’re setting your pan up for success, ensuring that your initial cooking experiences are positive and that the pan’s nonstick capabilities are maximized from the very beginning.
This proactive approach is a hallmark of careful cookware care.
Temperature Control Is Key
Temperature is arguably the most critical factor in successful nonstick cooking. As mentioned, overheating is the enemy. This applies not only to preheating but also to the entire cooking process.
If a recipe calls for high heat, a nonstick pan might not be the best choice. Opt for medium or medium-low heat whenever possible. For tasks like browning meat, if you must use a nonstick pan, keep the heat at a moderate level.
You’ll still get some browning, and more importantly, you’ll prevent damage to the coating. Many nonstick pans are simply not designed for searing at very high temperatures required for some dishes.
- Avoid using nonstick pans for very high-heat searing.
- Medium heat is generally ideal for most nonstick cooking.
- Lower the heat if you see smoke or the pan surface looks discolored.
If you’re aiming for a deeply browned crust on a steak, for example, a cast iron or stainless steel pan would be a much better choice. Nonstick pans excel at tasks where gentle, even heat is needed, such as cooking eggs, fish, pancakes, or sautéing vegetables. By understanding the limitations of your nonstick cookware and choosing the right pan for the job, you’ll not only achieve better cooking results but also significantly extend the life of your nonstick pans.
It’s about matching the tool to the task.
The Importance Of Cooling
Another common mistake relates to temperature changes. Never plunge a hot nonstick pan into cold water. This drastic temperature difference, known as thermal shock, can cause the pan’s surface to warp or even crack, severely damaging the nonstick coating.
Always allow the pan to cool down to a safe temperature before washing it. Even if you’re in a hurry, a few minutes of cooling on a heat-resistant surface will prevent irreversible damage. This simple step helps maintain the structural integrity of the pan and its coating.
- Allow the pan to cool before washing.
- Sudden temperature changes can damage the nonstick coating.
- Use a heat-resistant surface for cooling.
For instance, after frying some chicken and needing to clean the pan quickly, resist the urge to run it under cold water immediately. Instead, set it aside on a cooling rack or a heat-proof mat for five to ten minutes. By the time you’re ready to wash it, the pan will have cooled sufficiently to avoid thermal shock, preserving its shape and its nonstick qualities.
This consideration for temperature change is a fundamental aspect of maintaining durable cookware.
Dishwasher Caution
While some nonstick cookware is advertised as dishwasher-safe, it’s generally advisable to hand wash them. The high heat, harsh detergents, and forceful water jets in a dishwasher can degrade the nonstick coating over time. Even if the manufacturer states it’s safe, hand washing is a gentler method that will prolong the life and effectiveness of your nonstick pans.
The detergents used in dishwashers are often much stronger than those used for handwashing and can strip away the protective layers of the nonstick surface more quickly.
- Handwashing is generally recommended for nonstick pans.
- Dishwasher detergents can be too harsh for the nonstick coating.
- Regular handwashing extends the lifespan of the cookware.
Think of the dishwasher as a powerful cleaning machine that can be too aggressive for the delicate nature of nonstick surfaces. Even if the pan survives the dishwasher, repeated exposure to its intense cleaning cycles will likely lead to a gradual breakdown of the nonstick coating. A quick wash by hand with a soft sponge and mild soap is far more beneficial for the long-term performance of your cookware.
It’s a small amount of extra effort that ensures your pans remain reliably nonstick for many meals to come.
Sample Scenarios
Let’s look at a couple of common cooking situations to see how avoiding these mistakes makes a difference. These scenarios illustrate the practical application of proper nonstick pan care.
- Scenario 1 Delicate Fish Fillets Imagine you’re trying to pan-sear a delicate sole fillet. If you preheat the nonstick pan too high, use a metal spatula, or overcrowd the pan with too many fillets, the fish will likely stick and break apart. The skin will tear, and the fillet will fall to pieces before you can even flip it. However, by preheating on medium heat, using a silicone spatula to gently lift the fillet, and cooking only two fillets at a time in a reasonably sized pan, the fish will release easily, develop a beautiful golden crust, and remain intact.
- Scenario 2 Morning Scrambled Eggs A common breakfast is scrambled eggs. If you use a scratched nonstick pan, or if you overheat it before adding the eggs, they will cling stubbornly to the bottom, creating a mess. Even with a bit of butter, the damaged surface can’t hold up. But with a well-maintained nonstick pan, heated on low to medium heat, and stirred gently with a wooden spoon, the eggs will cook evenly and slide right out of the pan onto your plate, leaving the pan almost clean.
Frequently Asked Questions of Common Nonstick Cooking Mistakes To Avoid
How often should I re-season my nonstick pan?
Most modern nonstick pans do not require regular re-seasoning after the initial preparation. However, if you notice a decrease in nonstick performance, a light re-seasoning might help. Always check the manufacturer’s instructions for specific advice.
Can I use cooking spray on my nonstick pan?
While some cooking sprays are formulated to be less likely to cause buildup, it’s generally safer to use a small amount of liquid oil or butter. Some sprays can leave a residue that hardens and impairs the nonstick surface over time. If you do use spray, ensure you clean the pan thoroughly afterwards.
What is the best material for utensils with nonstick pans?
Silicone, wood, and nylon are the best materials for utensils used with nonstick pans. These materials are soft enough not to scratch or damage the delicate nonstick coating, ensuring its longevity and performance.
How do I know if my nonstick pan is ruined?
If your nonstick pan has visible scratches, chips, peeling coating, or if food consistently sticks despite proper preheating and minimal oil, it’s likely time to replace it. These signs indicate the nonstick coating has been compromised.
Can I use my nonstick pan on an induction cooktop?
Not all nonstick pans are induction-compatible. Induction cooktops require cookware with a magnetic base. Check the product description or the bottom of your pan for a symbol indicating induction compatibility.
Final Thoughts
Mastering the use of nonstick cookware is all about understanding its delicate nature and treating it with the right care. By now, you’ve seen how simple changes in your cooking and cleaning habits can make a huge difference. Avoiding common nonstick cooking mistakes, like overheating the pan, using metal utensils, or cleaning too aggressively, will ensure your pans perform beautifully for a long time.
Remember that gentle preheating, the right kind of utensils, cooking in batches, and a soft approach to cleaning are your best allies. Proper storage also plays a role in keeping those precious nonstick surfaces intact. Think of your nonstick pans as partners in your kitchen; a little attention goes a long way.
With these tips, you can enjoy effortless cooking and easy cleanup, making every meal a more pleasant experience. So, go ahead and try cooking those delicate eggs or that flaky fish with confidence, knowing you’re using your nonstick pans the right way. Your cooking will thank you for it.